Create an "Add to calendar" attachment for an email message
When creating an event for either fellow associates or students, it might make more sense to provide the audience with an entry that can be added to their own calendar without the need to respond to the event.
To do this, you can easily provide the meeting information as an attachment to an email.
Create the event as an appointment on your calendar
The difference between a meeting and an appointment is that meetings include multiple people. This seems counterintuitive, but what you want is for the audience to create an appointment on their own calendar for your event.
- Open your calendar
- Select the New Appointment button on the ribbon

-
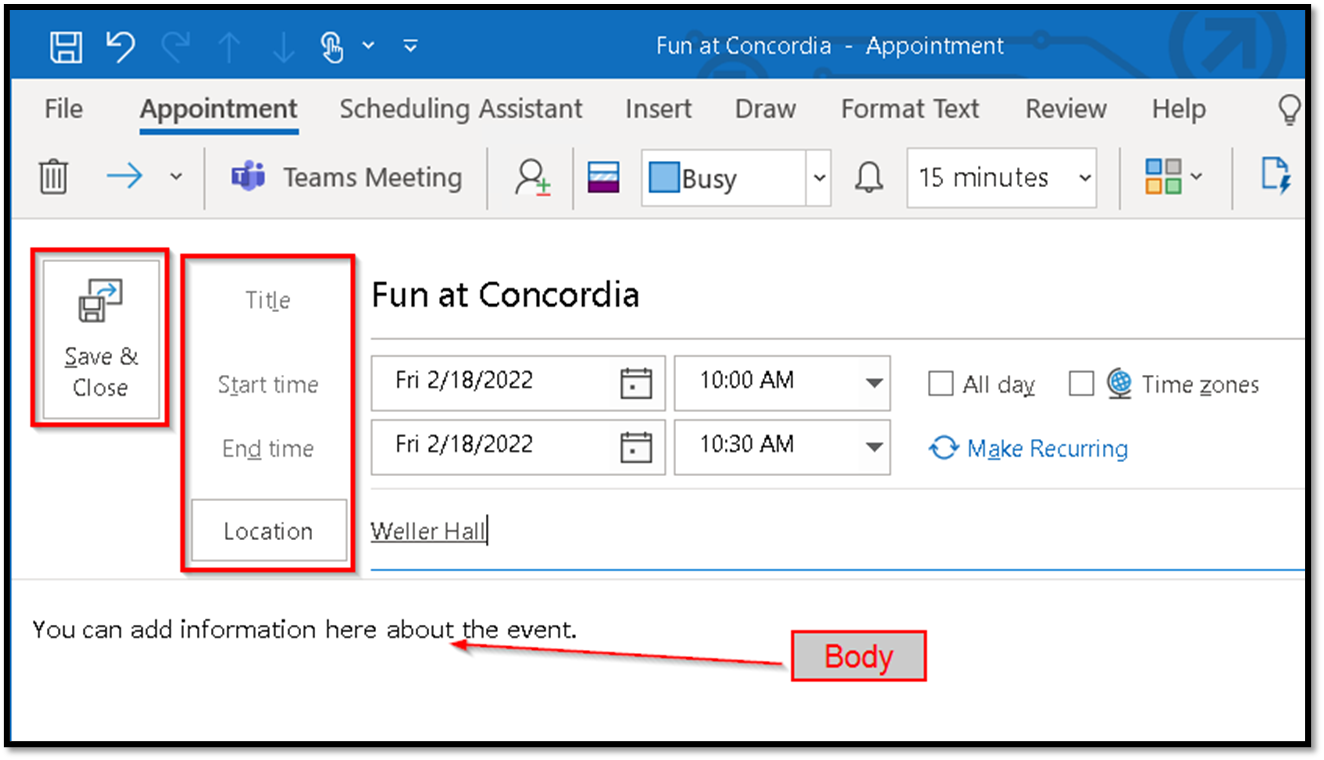
Enter the information for the event in the meeting, as you'd like it to appear on the audience's calendar.
- Title
- Start Time
- End Time
- Location
- Body, including information such as the agenda, virtual meeting information or an image

- Save & Close
Create an email where you provide the meeting attachment
An Internet calendar (iCalendar) attachment is a copy of your appointment in a format that can be widely used by various calendar programs.
- Select the event on your calendar
-
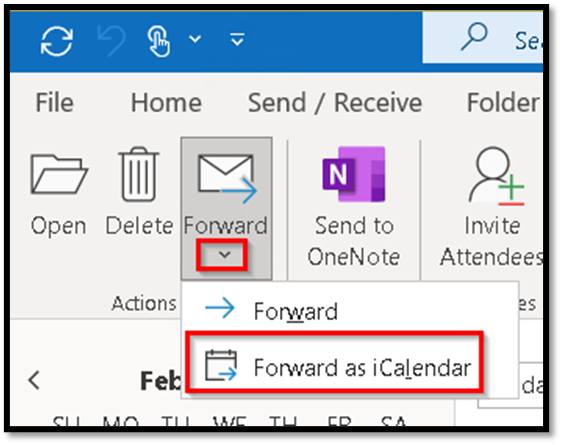
If necessary expand the ribbon in Outlook by clicking the down arrow on the right side

- Select the Forward menu from the ribbon
- Choose Forward as iCalendar

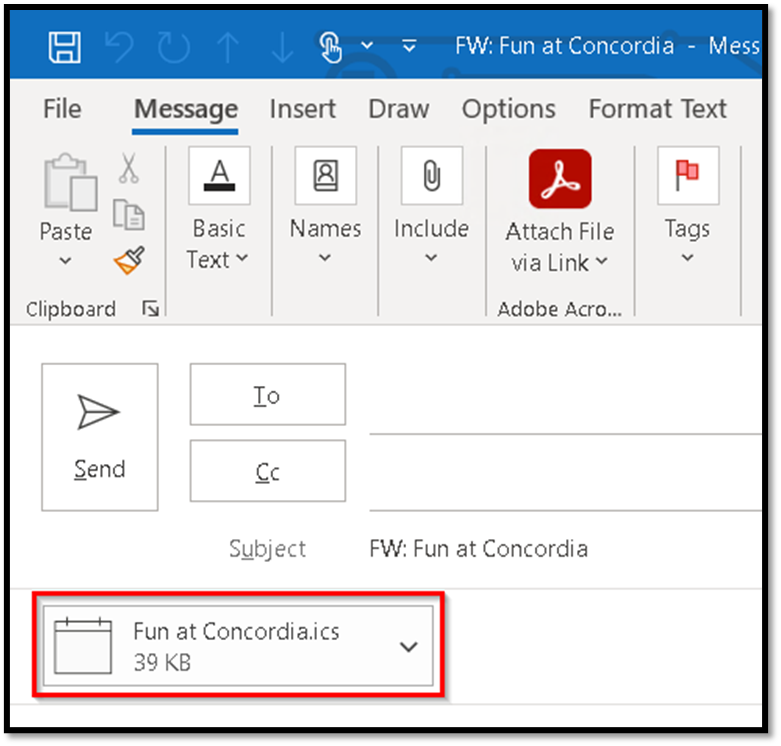
- A new email message appears with an iCalendar (*.ics) attachment

- Craft your email and encourage the audience to use the attachment to add the event to their own calendar.
- Send the message
Each recipient now has the event announcement and can choose to add it to their own calendar.
More information can be found from Microsoft: Create an Add to calendar link in an email message (microsoft.com)
If you have questions about this process, please contact the Helpdesk.