How do I install and run Cisco Secure Client (VPN)?
Cisco Secure Client is the virtual private network (VPN) we use to securely connect to Concordia's network remotely. It allows you to access all resources you would on-campus from a remote location.
Note: This guide is for Windows computers only. For setting up the VPN on a Mac, please contact us via ticket or phone for assistance.
Installation
- Open Software Center (you can search for it in the Windows search bar and open the app)

- Select Applications from the menu on the left

- Click on Cisco Secure Client, then click Install
Note: If you don't see the Cisco Secure Client in Software Center, click on Options -> Computer Maintenance -> Sync Policy to update the list of applications. It may take a minute or two for the Cisco Secure Client to appear in the application list. If it still doesn't appear, check with your supervisor to make sure they've submitted a request for your remote access, and have them follow up on the request.
Operation
Note: The following steps will only work when you connect from off-campus. If you try to connect while on-campus you will receive an error.
- Open Cisco Secure Client (you can search for it the same way you did for Software Center)
- In the application window, type "vpn.cune.edu" and select Connect

- Enter your email address and password

-
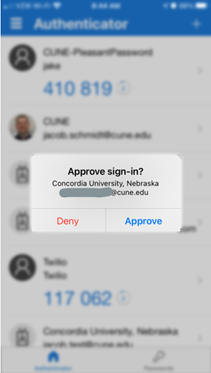
After entering your email and password you must validate the login attempt using MFA (this is typically done with the Authenticator app on your mobile device)
Note: In order to login to the Cisco Secure Client you MUST have your preferred MFA method set to either 'Notify me through App' or 'Call my authentication phone'. For steps on setting up MFA see our article How do I set up MFA for my Office 365 account? If you have already setup MFA and need to update your preferred method see our article How do I change my MFA settings?

- After validating the authentication using MFA you'll be connected to the VPN. Your computer will now behave as though it were connected to the campus network.